
![]()
![]()
Do-It-Yourself information for the modifications I've completed
![]()
Do-It-Yourself information for essential wear and tear items
![]()
Articles covering all the ways to maintain your car
![]()
All about the BMW 330ci
![]()
Various links that I've found valuable
![]()
A few pictures of my car and some others
Painting Your Brake Calipers And Rotor Hats
Warning!
The information provided at "Bmw330ci.net" web site is "as is" with all faults and without warranty of any kind, expressed or implied, including those of merchantability and fitness for a particular purpose, or arising from a course of dealing, usage or trade practice. "Bmw330ci.net" web site nor it's owner/creator, can not and does not provide any warranty, expressed or implied, about the accuracy or use of information found on "Bmw330ci.net" web site. The user assumes that risk.
THE USE OF THIS INFORMATION IS FOR YOUR REFERENCE ONLY. BMW330CI.NET AND ITS OWNER/CREATOR DISCLAIM ALL LIABILITY FOR DIRECT, INDIRECT, INCIDENTAL, OR CONSEQUENTIAL DAMAGES OR INJURIES THAT RESULT FROM ANY USE OF THE EXAMPLES, INSTRUCTIONS OR OTHER INFORMATION ON THIS PAGE.
Before and After Shots
;)
;)
;)
Difficulty
It should be quite apparent why I decided to paint my calipers, but for many of you it will merely be because you'd like another color. This is a fairly easy DIY but it becomes more difficult if you decide to do it the right way, where you take your calipers and rotors off of the car to paint them. If you leave them on the car, you're job will not last and what's the point. You will have to bleed the brakes when you are done if you take the calipers off, so if you don't want to bleed your brakes, don't take your calipers off. Basically, if you are able to change your oil and can operate a spray paint can, you can complete this job. Be prepared though, in order to properly prep your calipers you will most likely spend a few hours of work.
Note
I know that this Do-It-Yourself is lacking some pictures, but it's the first one I did and didn't take that many. I apologize ahead of time, but you should be able to figure things out using some other websites and it will all make sense once you get it done. If you have the Bently's manual, it will also make this more self-explanitory. Don't worry too much, it isn't that bad.
Parts Needed
2-4 Cans of High Temperature Ceramic Paint (Chose your color and brand, just make sure that they can withstand high temperatures. I use VHT Flameproof paint which goes to 1500F, which is plenty high for me.)
1-2 Cans of Brake Cleaner
Sand Paper 60-120 grit
Laquer Thinner or Equivalent
Plastic Baggies (At least 4)
Rubber Bands (At least 4)
Newspaper and Cardboard (Things are going to get messy, and overspray can be bad)
Anti-Sieze Compound
Brake Anti-Squel Compound (Enough for 2 axles)
Blue Painters Tape
Tools Needed
Floor Jack or Lift
Jack Stands (If you are not using a lift)
14mm Flare Wrench (These are wrenches specifically designed for working on brake lines since they wont strip the nuts, which would be a very bad thing. You can pick them up at your local Sears if needed.)
Torque Wrench
6mm and 7mm Allen Socket (The 6mm allen socket can be replaced with a wrench if you like.)
17mm Wrench and Socket
Flat Head Screwdriver
Rubber Mallet
Large and Small Wire Brushes
Instructions (For Pictures Click Here)
Safely lift the car and remove the wheels
1. Using a lift or a floor jack with jackstands lift the car and remove the wheels. Instructions for jacking up your car can be found here. This can be a very dangerous step, so make sure that the car is properly secured before ever getting under it. Never get under a car that is just supported by a jack!
2. Using a 17mm deep socket with an impact wrench or hand ratchet, remove the lugnuts and set your wheels aside. If your alloys are siezed onto your brake rotors, sit down on your butt and give the sidewalls of the tires a good kick until it has become unloosened. If they have siezed on, make yourself a note to add some antisieze lubricant to the brake rotors before installing the wheels.
Remove The Brake Anti-Rattle Clips
3. Using a flat head screwdriver, pry under the arms of the anti-rattle clips until they pop off. Be careful as they can pop of quite rapidly and suprise you! This will take a little bit of time to understand, but once you have got one the rest will come easily.
Detach The Brake Lines
4. Using the 14mm flare wrench, either remove the brake rubber brake line at the caliper or by its entry in the wheel well. I reccomend by the wheel well, but this is up to you. Since I already had things apart, I decided to upgrade to stainless steel brake lines, but once again this choice is up to you. If you have new brake lines, there will be rubber plugs provided for capping off the brake line, if you don't have these, get your plastic baggie and rubber band ready. WARNING: Brake fluid will strip your paint, so make sure it doesn't come in contact with your paint!
5. Remove the brake line and cap the line with the baggie or the rubber stopper. This will most likely be quite messy.
Remove The Calipers
4. Remove the 2 plastic covers from behind the caliper to expose the bolts.
5. Using the 7mm allen socket, remove the two bolts holding the caliper on. Take the caliper off of the carrier. Since it is not attached anymore, you can set it aside. On the drivers side in the front and the passengers side in the rear there are the brake pad wear sensors. They simply pull out of the brake pad. Be careful not to break them and you won't have to replace them.
6. Remove your brake pads from the calipers and set them aside.
Remove The Carrier
7. Using the 17mm wrench, remove the 2 bolts holding the carrier onto the assembly. Take it off and set it with the caliper.
Remove The Rotor
8. Using a 6mm allen socket or wrench, undo the set screw on the rotor.
9. It is most likely that the rotors will be difficult to get off so use the rubber mallet to loosen it. Remove the rotor and set it aside along with the caliper.
Clean Your Calipers and Carriers
10. This is the most lengthy step since you will have to spend some time getting all the brake dust, rust, and other stuff off of the calipers. Start off with brake cleaner in order to get the brake dust off of the caliper. WARNING: Brake cleaner is also a corrosive chemical and might damage your paint or plastic, so be careful and read your can well. Use the wire brushes and brush them all until there is no rust or brake dust left anywhere. When you are completely sure that everything is good you are ready for sand paper.
11. Using a low grit sandpaper sand the calipers the same way that you brushed them making sure to cover all of the surfaces.
12. Then using laquer thinner or equivalent, clean each of the calipers thoroughly. This will ensure that they are clean for painting. Do not use water to clean them because it will promote surface rust, which won't be good for painting.
Clean Your Rotors
13. Using brake cleaner clean the rotors of brake dust. Take the sand paper and make sure to sand the hat down since it will need to be painted as well. Once again, clean it with laquer thinner or equivalent to prepare it for cleaning. While you are at it, clean the hub where the rotor attaches with a wire brush and some brake cleaner.
Mask off your rotors, carrier, and calipers
14. Using blue painters tape mask off everything you don't want to be painted. This means covering the piston in the caliper, the holes where the bolts go, and the rotor surface itself (This should be self explanitory).
Paint Your Calipers and Carriers
15. Take your calipers away from anything you don't want to be painted and carefully paint them with at least 3 coats. It is important that you follow the directions on the spray cans and remember that many thin coats are better than a thick one.
;) Mask Off The Rotors ;) Paint The Rotors |
Painting Your Rotors |
Remove the Tape
18. Remove the painters tape and get everything back in order to put it all back on the car.
Lubricate And Anti-Sieze The Surfaces
19. Lubricate the slides on the carrer and behind the brake pads. You can be generous because it will not hurt anything. This will ensure that there is no noise when everything is put back together.
20. Put some anti-sieze compound on the hub where the rotor attaches as well as on the hat of the rotor where the wheel will attach. This will make taking things apart much easier next time.
;) Put It Back Together |
Put Everything Back Together |
;)
Review and Conclusions
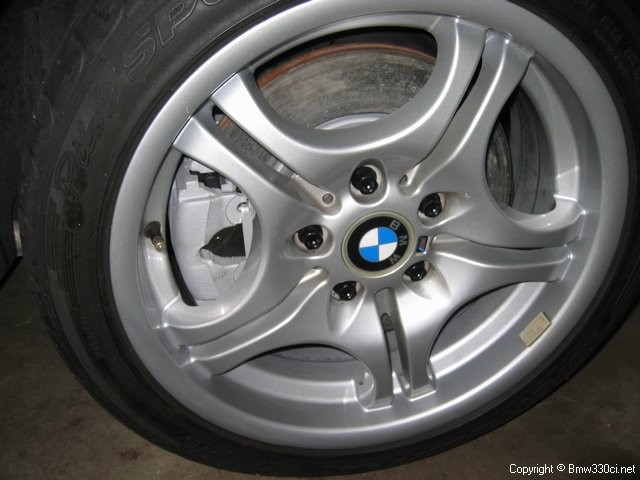
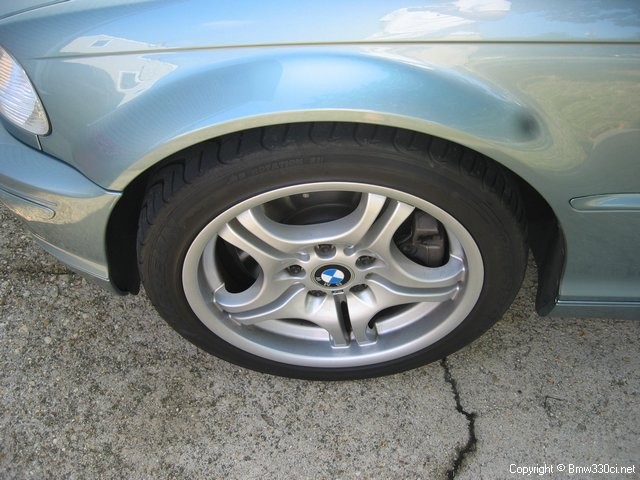
As they say, a picture is worth a thousand words, and frankly, I believe that the before and after pictures say everything. It looks so much better! This was something that bothered me, so I am very glad to get it taken care of. Take a look at the pitures below, which shows that it is lasting at least one year out. If you're not happy with your calipers, take a weekend and make yours look better. I think that is all that needs to be said.
After putting everything together
One year later
Disclaimer
All product manufacturer logos are property of their respective manufacturer.