Do-It-Yourself information for the modifications I've completed

Do-It-Yourself information for essential wear and tear items

Articles covering all the ways to maintain your car

All about the BMW 330ci

Various links that I've found valuable

A few pictures of my car and some others

UUC SwayBarbarian Sway Bar Install

Warning!
The information provided at "Bmw330ci.net" web site is "as is" with all faults and without warranty of any kind, expressed or implied, including those of merchantability and fitness for a particular purpose, or arising from a course of dealing, usage or trade practice. "Bmw330ci.net" web site nor it's owner/creator, can not and does not provide any warranty, expressed or implied, about the accuracy or use of information found on "Bmw330ci.net" web site. The user assumes that risk.

THE USE OF THIS INFORMATION IS FOR YOUR REFERENCE ONLY. BMW330CI.NET AND ITS OWNER/CREATOR DISCLAIM ALL LIABILITY FOR DIRECT, INDIRECT, INCIDENTAL, OR CONSEQUENTIAL DAMAGES OR INJURIES THAT RESULT FROM ANY USE OF THE EXAMPLES, INSTRUCTIONS OR OTHER INFORMATION ON THIS PAGE.

Why upgrade your sway bars?
If you've ever taken a corner quickly, you will immediately notice there is body roll in the car. On the simplest level sway bars reduce body roll or sway and allow you to handle much better. Even further, adjustable sway bars allow you to fine tune your under steer and over steer (back end out) to your personal preferences. If you're a car enthusiast, this is a must do modification that will continually put a smile on your face!

Difficulty
This is a fairly easy do it yourself if you're on a lift, but if you're using jack stands, then it will be a little bit more time consuming and painful (I did it, so you can do it too). It's really just removing bolts and adjusting everything properly. You can definitely do this modification yourself, and I highly recommend you do it. If you can get access to a lift for this job, Do It!

Parts Needed

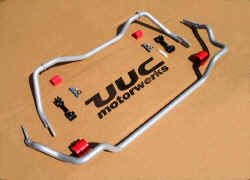
UUC SwayBarbarian Sway Bars $350 (This will come with everything you need in order to complete the installation)
White Lithium Grease
Plumbers Teflon Tape

Tools Needed
Floor Jack (A high lift SUV jack will make the job much easier)
Jack Stands (If you are not using a lift)
Torque Wrench (10-100 ft-lbs range will be sufficient)
Various Sockets and Hand Wrenches
Screwdrivers
Pliers

Instructions

Safely lift the car and remove the wheels
1. Using a lift or a floor jack with jackstands lift the car. Instructions for jacking up your car can be found here. This can be a very dangerous step, so make sure that the car is properly secured before ever getting under it. Never get under a car that is just supported by a jack!
2. Using a 17mm deep socket with an impact wrench or hand ratchet, remove the lugnuts on the rear wheels and set your wheels aside. If your alloys are seized onto your brake rotors, sit down on your but and give the sidewalls of the tires a good kick until it has become unloosened. If they have seized on, make yourself a note to add some anti-seize lubricant to the brake rotors before installing the wheels.


Front splash shield

Remove the front splash shield
3. Using a phillips screwdriver, remove the front splash shield (underneath the engine). The screws will not come all of the way out, but the cover will still come off


Sway Bar Endlink

Unattach the sway bar endlink
4. Using a 17mm wrench remove the sway bar endlink from the sway bar which is right inside your front wheels near the bottom of the struts. You will need to position a wrench inbetween to hold the nut (towards the wheel) and use a 17mm socket to loosen it.
5. When it has been loosened, set aside the nut and move the endlink out of the way.


Sway bar bushing bolts

Remove the bushing bolts
6. Using a 13mm socket (deep or with extensions), remove the four bolts that hold on the sway bar bushings. Be careful, because the bar will drop once the last bushing has been unattached and it is awkward.


Difference in sway bars


Plumbers tape on the sway bar


Greased bushing back on the bar

Grease and tape the new front sway bar
(Note the difference in the OEM sport sway bars (top) and the new stiffer UUC ones, it's quite a big difference!)
7. Wrap the plumbers teflon tape around the bar where the new bushing will go. This will help keep the urethane bushings quiet for much longer and is a long time racers tip.
8. Generously apply white lithium grease all around the inside of the bushing and the outside of the plumbers tape. It will squeeze out, but it will be quiet.


Installed front bushing


Endlink reattached

Reinstall the front swaybar
9. Position the bar back the way the old one was (it will only fit one way) and reattach the 13mm bolts. Tighten them to 16 ft-lbs.
10. Now you must choose one of the three different settings for the front sway bar. Since I wanted to keep a little bit of understeer for my car I chose to use the middle setting. It's been a good choice for me and you might want to start out with it there as well. (Note: This setting can be changed later.)
11. Tighten the 17mm sway bar endlink just as before using a socket and a wrench and tighten it to 48 ft-lbs. You're now finished with the front.


Rear sway bar endlink

Unbolt the rear sway bar endlink and undo the sway bar bushing bolt
12. Using 2 13mm wrenches or one with a 1/4" socket, remove the rear end link from behind the rear spring. You will need to remove your rear tires to get at the endlink bolts. Simply hold the nut stationary with one wrench and remove the bolt. Hold onto the bolt and nut since we will resuse this later.
13. Similar to the one behind the spring there is one above the bushing that also needs to be undone (I don't have a picture), but if you reach up there and feel around, you will find it. Loosen it the same way.
14. There is a metal tab holding the bushing up there so using a screwdriver or equivalent push up to detach the bushing.


Old and new rear sway bars

Remove, tape, and grease the new rear sway bar
15. This is where having a lift will make this quite easy. You will now have to remove the rear sway bar. This is quite challenging on jack stands, but this is my reccomendation. Lift the rear of the car as high up as you can, while still having the jack stands support it. Then you will need to bend the drivers side endlink around as you see in the picture. This will allow you more room to maneuver. Bend the passengers side down and slowly work it out. It took me all of about 3 minutes since I have a high lift floor jack that can go very high. (Note you can remove the rear exhaust if you want, but that in itself is quite a bit of work). I've heard of some people going out their drivers side wheel well, but I didn't even try it. This is probably the toughest step, so once you're done take a break.
16. Tape up the rear and grease it as well.


Reattach the rear endlinks


Reinstall the rear bushings


Unloaded sway bar position


Finished rear sway bar

Install the new rear sway bar
17. Install the new endlinks exactly like you removed them making sure that the grease fitting is exposed to the outside of the car to grease them later. Tighten them to 25 ft-lbs.
18. Install the rear bushings just like they are removed. If you are having trouble getting the bolt through, take some large pliers to help get things compressed. Tighten the 13mm nut to 16 ft-lbs.
19. Now spin the endlinks until the rear sway bar is touching the half shaft. This will most likely be the best position, since when under load it will be about half way in between. (Note: This can be adjusted later, which we will double check on, but this is a good starting position.) Once again, make sure that the grease fitting is positioned in a way that you can grease it later.
20. Now using a 5/8" wrench for the bolt and a 11/16" wrench for the nut, tighten up the sway bar end link to the sway bar. Once again I chose the full stiff setting, which is closet to the rear of the car. I chose this for better performance and to counteract some of the natural under steer in the car. Choose whatever setting makes you the happiest. (Note: this can easily be changed later.)


Properly aligned endlink

Make sure that the rear sway bar is properly aligned
21. Now lower the rear suspension and check to make sure that the sway bar is aligned half way in between the rear trailing arm and the half shaft. If it isn't, go back and readjust the sway bar endlink so that it is when under load.
22. Tighten the 17mm nut on the sway bar endlink to lock it in place.


Review and Conclusions

After completing the install the first thing I noticed was practically zero body roll. In many respects, this modification is dangerous, because it makes you want to push the limits of the car. I highly recommend adding some new sway bars if you're even slightly thinking about it. When it is installed properly, it makes no extra noise and makes your car seem like a new, better road handling machine! These sway bars definitely blow your mind away!


© 2001-2018 Bmw330ci.net
Disclaimer
This site is not affiliated with BMW NA or BMW AG. The BMW name, trademarks, and logos are the registered property of BMW AG.
All product manufacturer logos are property of their respective manufacturer.