
![]()
![]()
Do-It-Yourself information for the modifications I've completed
![]()
Do-It-Yourself information for essential wear and tear items
![]()
Articles covering all the ways to maintain your car
![]()
All about the BMW 330ci
![]()
Various links that I've found valuable
![]()
A few pictures of my car and some others
UUC Stage 3 Sachs Performance Suspension Install
Warning!
The information provided at "Bmw330ci.net" web site is "as is" with all faults and without warranty of any kind, expressed or implied, including those of merchantability and fitness for a particular purpose, or arising from a course of dealing, usage or trade practice. "Bmw330ci.net" web site nor it's owner/creator, can not and does not provide any warranty, expressed or implied, about the accuracy or use of information found on "Bmw330ci.net" web site. The user assumes that risk.
THE USE OF THIS INFORMATION IS FOR YOUR REFERENCE ONLY. BMW330CI.NET AND ITS OWNER/CREATOR DISCLAIM ALL LIABILITY FOR DIRECT, INDIRECT, INCIDENTAL, OR CONSEQUENTIAL DAMAGES OR INJURIES THAT RESULT FROM ANY USE OF THE EXAMPLES, INSTRUCTIONS OR OTHER INFORMATION ON THIS PAGE.
Why upgrade your suspension?
There are two reasons to upgrade your suspension. The first is that you have reached the necessary milage and your OEM sports suspension is no longer performing as it should. The second reason is to get better handling and lowered ride height. I would think that the latter of the two is reason enough for most people to invest in a new suspension. I chose the UUC Stage 3 Sachs Performance Suspension because I do not need the adjustability of a coilover setup. Since I drive my car every day, it is essential to have the best of both worlds, which are comfort and performance. That is why I went with UUC and haven't had any regrets. Obviously this choice is up to you, but either way, you cannot go wrong.
Difficulty
Changing your suspension is a time consuming task and if you have never done it before make sure you are budgeting at least 8 hours to take everything apart and get it done. I highly reccomend using air tools and a lift because it will make the job easier, but you can definitly do it in your garage with hand tools, except it will take much longer. There are also some steps where you will most likely need an extra pair of hands to make things easier as well. However, it is another job that if you want to better understand your car and know that everything was done correctly, give it a shot. You'll be tired when its all done but have the satisfaction of a job well done.
Parts Needed
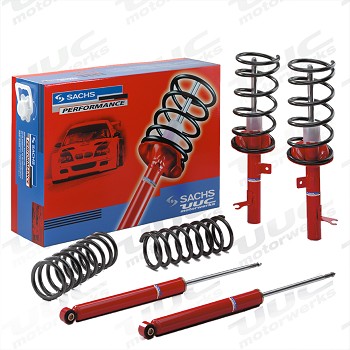
UUC Stage 3 Sachs Performance Suspension $699 (This will come with everything you need in order to complete the installation including new front bump stops and proper fasteners)
Tools Needed
Floor Jack (For supporting the control arms and brake assembly)
Jack Stands (If you are not using a lift)
Torque Wrench (10-100 ft-lbs range will be sufficient)
Impact Wrench (This will make everything go much faster, but is not necessary)
Spring Compressors (You can rent some from your local auto parts store, but we will go into more depth on these a little bit later)
Various Sockets and Hand Wrenches (10mm, 13mm, 17mm, 18mm, 21mm, 22mm)
Bungee Cord or Rope
WD-40 or Other Spray Lubricant
Front Suspension Instructions
Safely lift the car and remove the wheels
1. Using a lift or a floor jack with jackstands lift the car and remove the wheels. Instructions for jacking up your car can be found here. This can be a very dangerous step, so make sure that the car is properly secured before ever getting under it. Never get under a car that is just supported by a jack!
2. Using a 17mm deep socket with an impact wrench or hand ratchet, remove the lugnuts and set your wheels aside. If your alloys are siezed onto your brake rotors, sit down on your but and give the sidewalls of the tires a good kick until it has become unloosened. If they have siezed on, make yourself a note to add some antisieze lubricant to the brake rotors before installing the wheels.
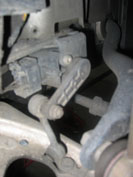 Xenon Leveling Sensor |
Unattach the passenger side xenon leveling sensor |
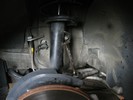 Sway Bar Endlink 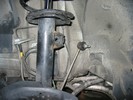 Move The Endlink Out Of The Way |
Unattach the sway bar endlink |
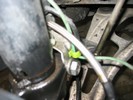 Left Rear Shock Mount |
Remove the lower shock clamp and support the lower control arm and brake assembly 6. Place a floor jack underneath the control arm to support it once the strut has been dropped. 7. Using a 18mm socket, remove the lower shock clamp. Spray some lubricant in the area around the clamp so that the shock will slide out smoothly. 8. Twist the shock until the lower clamp slides all the way off of the shock. Since the control arm and brake assembly weigh quite a bit, make sure that you are prepared for it to come off. Since nothing is holding the brake rotor and caliper, it will try and rotate away from the car. Use a bungee cord or some rope to ensure that it doesn't put too much strain on the brake lines. If you have another box or something, you can use it to help hold the assembly as well. |
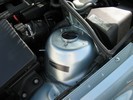 Remove The Stut Mount Bolts |
Remove the strut 9. Open the hood and loosen the 3 13mm nuts on the strut tower using a socket or a wrench. 10. Get an assistant to hold the strut from underneath and remove the strut mount nuts. The strut should now be able to be removed from the car. |
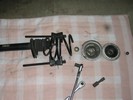 Disassembled Struts 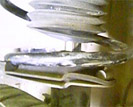 Proper Orientation Of Spring In Strut 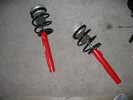 Assembled New Struts |
Dissasemble, and assemble the new strut |
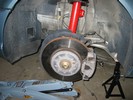 Installed New Struts |
Install the new struts 14. Put the new shock back into place and loosly tighten the 3 13mm strut mount nuts on the strut tower inside the hood. 15. Using a jack to raise the control arm, guide the new shock into place in the shock clamp. If you examine the shocks before putting them on, you will notice that there are some ridges, they will fit into the back of the shock clamp. Make sure that these line up and that the new strut sticks out of the bottom of the clamp. 16. Once you are sure that the shock is in its right position, replace the shock clamp bolt and tighten the 18mm bolt to 60 ft-lbs. Add some loctite if desired. 17. Tighten the 3 13mm strut mount nuts to 18 ft-lbs. 18. Reattach the sway bar endlink the same way that you took it off and tighten the 17mm bolt to 48 ft-lbs. |
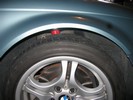 Finally Complete |
Double check everything and reinstall the wheel 19. Take a look over everything and make sure that you have reattached and torqued everything to specifications. If it looks good, put the wheels back on and loosly tighten up the lug nuts. Make sure also that have you reattached the xenon leveling sensor as well on the passenger side. Complete this for both sides. 20. Make sure that when the car is returned to the ground that the lug nuts are torqued to 88 ft-lbs |
Rear Suspension Instructions
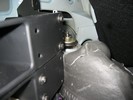 Left Rear Shock Mount |
Remove the rear trunk liner on both sides 21. Take your time and slowly remove the trunk liner until the rear shock mounts are exposed. They are covered with some sound damping material, so just slide that out of the way. You do not need to completely remove them, but have enough room to be able to loosen and remove the bolts in the trunk. They simply come unattached by removing the black rivets placed along outside and some careful maneuvering. On the passenger side, make sure to unattach the emergency gas flap. It is green and merely pulls off, set this aside for reattaching it later once we are finished. 22. Also make sure that the rear wheels are off, and most importantly the emergency brake is off. If the emergency brake is on, the rear suspension will not drop and you will not be able to get the rear suspension out. With this being said, its also important to make sure that everything is safe once again and the car is properly supported. |
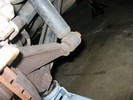 Lower Shock Bolt |
Remove the lower rear shock bolt and support the lower control arm 23. Using a 18mm wrench or socket remove the lower shock bolt and let the shock dangle. Since this was the only thing holding the assembly up, make sure you have a floor jack positioned in order to bear the load of the rear suspension. |
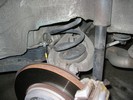 Shock and Spring Assembly 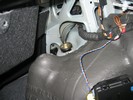 Right Rear Shock Mount |
Remove the rear shock and spring |
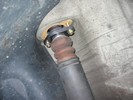 New Rear Shock Mount |
Install the new rear spring, shock and shock mounts |
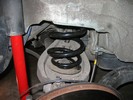 Finished Rear Suspension 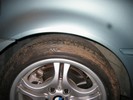 Finally Complete |
Double check everything and reinstall the wheel 31. Make sure that everything is tightend to specifications and back together properly. 32. Reattach the wheel and loosly tighten up the lug nuts. Complete these steps for both sides of the rear suspension. 33. Lower the car and make sure to tighten the 17mm lug nuts in a star pattern to 88 ft-lbs. 34. Admire your new suspension and take it out for a test drive. If you hear any weird noises in your suspension, make sure you stop and carefully identify the problem. It is also important if you want to ensure proper tire longevity get a 4 wheel allignment. |
Review and Conclusions
After completing the install I can definitly say that this modification makes car handle much better. I feel like it takes the bumps better but at the same time adds the extra performance that is needed. Furthermore, I think that the drop with the performance springs is just right. I personally do not like the "slammed" look so this fits just right for me! I highly reccomend it and after you install it you will notice yourself taking some corners much faster than you did before! Remember that it takes a couple of weeks for your new springs to settle in, so if you don't like the drop initially, give it some time. Soon it will look exactly like you want it.
For those of you who like before and after pictures, I thought that I would add them here so you can see the difference in ride height and looks. I couldn't be happier!
Before

After

Disclaimer
All product manufacturer logos are property of their respective manufacturer.