Do-It-Yourself information for the modifications I've completed

Do-It-Yourself information for essential wear and tear items

Articles covering all the ways to maintain your car

All about the BMW 330ci

Various links that I've found valuable

A few pictures of my car and some others

Changing Your Rear Trailing Arm Bushings (RTABs)

Warning!
The information provided at "Bmw330ci.net" web site is "as is" with all faults and without warranty of any kind, expressed or implied, including those of merchantability and fitness for a particular purpose, or arising from a course of dealing, usage or trade practice. "Bmw330ci.net" web site nor it's owner/creator, can not and does not provide any warranty, expressed or implied, about the accuracy or use of information found on "Bmw330ci.net" web site. The user assumes that risk.

THE USE OF THIS INFORMATION IS FOR YOUR REFERENCE ONLY. BMW330CI.NET AND ITS OWNER/CREATOR DISCLAIM ALL LIABILITY FOR DIRECT, INDIRECT, INCIDENTAL, OR CONSEQUENTIAL DAMAGES OR INJURIES THAT RESULT FROM ANY USE OF THE EXAMPLES, INSTRUCTIONS OR OTHER INFORMATION ON THIS PAGE.

Difficulty
This is not an easy job simply because it is a pain to remove the old bushing and press the new bushing in. If you've done a lot of suspension and bushing work, then it won't be bad, however if you haven't before, this could be challenging. I'd recommend giving yourself at least 4 hours if you've never done this before as getting the bushings in and out is the hardest part.
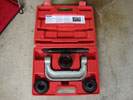

Ball Joint Press
RTAB Tool

So the question comes down to what tool do I need to get to accomplish this job. I did some research, priced them out, and decided I'd give the free auto parts store ball joint press a shot. I had heard that it could be done, but now I can confirm that it definitly can be done. Now a special tool may make the job easier, but this get the job done and isn't a lot of hassle.

Tools Needed
Torque Wrench
Various Sockets and Wrenches
Breaker Bar
Penetrating Oil (This will help do some of the work for you like PB Blast)
Ball Joint Press (Can be rented for free from your local auto parts store)

Parts Needed
OEM BMW M3 Rear Trailing Arm Bushings (Vorshlag P # 65-13RE-01) $55
Vorshlag RTAB Limiters (Vorshlag P # 24-12RT-01) $55

Instructions

Safely lift at least the rear of the car
1. Using a lift or a floor jack with ramps lift at least the rear of the vehicle. Instructions for jacking up your car can be found here. This can be a very dangerous step, so make sure that the car is properly secured before ever getting under it. Never get under a car that is just supported by a jack!

Remove the rear wheel
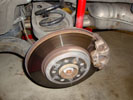

Remove the rear wheel

Remove the rear wheel
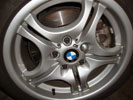
2. Using a 17mm deep socket with an impact wrench or hand ratchet, remove the lugnuts and set your wheels aside. If your alloys are siezed onto your brake rotors, sit down on your butt and give the sidewalls of the tires a good kick until it becomes loose. If they have siezed on, make yourself a note to add some antisieze lubricant to the brake rotor mating surface before reinstalling the wheels.


Disconnect the rear sway bar endlink


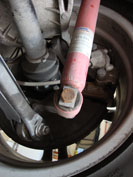
Disconnect the rear shock

Disconnect the rear swaybar and shocks
3. Using a 5/8" wrench for the bolt and a 11/16" wrench for the nut, loosen the sway bar endlink and disconnect it. We will do this to get some more room. You can skip this step if you assess you don't need it.
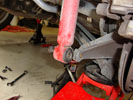
4. Using a 18mm wrench disconnect the rear shock from the trailing arm.


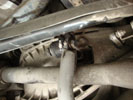
Note all the cables running along the trailing arm
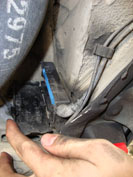

Disconnect them from the box
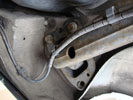

Remove them from the trailing arm
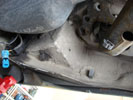

Everything removed

Disconnect all of the sensors running along the trailing arm
5. On the driver's side there is an ABS sensor. On the passenger's side there is an ABS sensor and a brake pad wear sensor. Be careful not to damage any of the cables as this will make for pain you don't want. Carefully disconnect them at the box and remove the clasps holding the wires to the trailing arm.


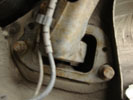
Mark the bracket so we don't mess up the alignment
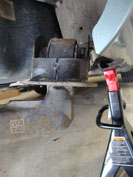

Drop the trailing arm
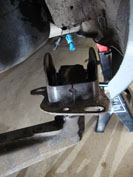

Remove the carrier from the bushing

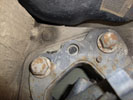
Disconnect and remove the RTAB bracket
6. Take a grease pencil and mark the location of the bracket on the frame. This will help to ensure your alignment isn't too off when you put everything back together. Also take note of the angle on which the bracket is installed, making sure it's the same at the end will ensure the right preload on the bushing. Mark it however you would like. Using a 16mm wrench, loosen the RTAB carrier from the frame.
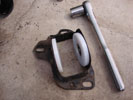
7. Using a 18mm wrench, loosen the bolt holding the carrier onto the RTAB.


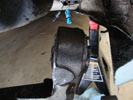
Press the bushing out


Started to press out


Use a socket or equivalent to press the bushing out the rest of the way

Press out the old bushing
8. Spray the RTAB with some PB Blast and let it sit, the old bushing is probably pretty well siezed in depending on the ammount of weather your BMW has seen.
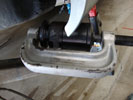
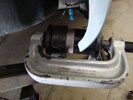
9. Get the biggest pipe and two ends and place the ball joint press onto the RTAB as seen in the picture. The goal here is only to begin to get the bushing moving, because once that's done, the rest is easy. It may seem like it's never going to make it, but trust me it will protest and make some noise, but eventually it will pop out.
10. Then take a large socket (I think I used a 32mm) and place it in the end of the tool (it has a much smaller diameter). Use it to press the bushing the rest of the way out.


Press the new bushing in


Press the new bushing in
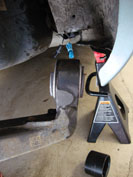

New bushing pressed in

Disconnect all of the sensors running along the trailing arm
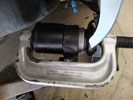
11. Locate the pipe that is the exact same size as the bushing and assemble the press as shown in the picture. Carefully begin pressing the bushing in. I put a bit of anti-size around the bushing to make sure it would be easier next time.
12. Once it's in as far as it will go, get the big pipe and use one of the end pieces to push the bushing in the rest of the way. Go until it's even on both sides. Now all the hard work is over, and we're off to assembly.


Vorshlag limiters being installed into the carrier
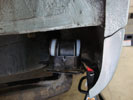

Properly align the trailing arm
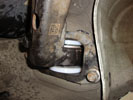

Reattach the trailing arm

Disconnect all of the sensors running along the trailing arm
13. Place the Vorshlag limiters onto the carrier and reinstall it onto the RTAB. This is where we make sure that it is at the same orientation as when we took everything apart. If you want to make sure that the preload is right, use a floor jack onto the rear suspension and check out to make sure the bushing isn't loaded when it's at it's normal ride height. Once you've got the right orientation, tighten up the 18mm bolt until it's firm.
14. Make sure that the bracket is lined up with our markings exactly as before and tighten everything down the 16mm bolts to 57 ft-lbs.


Put everything back together

Put everything back together
15. Reattach the rear shock to the trailing arm using a 18mm wrench and torque it to 74 ft-lbs.
16. Reinstall and run the ABS/brake wear sensors along the trailing arm.
16. Now using a 5/8" wrench for the bolt and a 11/16" wrench for the nut, reattach and tighten up the sway bar end link to the sway bar
17. Put the wheels back on (put some anti-sieze on the rotor hat if you had some trouble getting your wheels off before) and torque down your lug nuts to 88 ft-lbs after safely lowering your car.
18. Make sure you go and get a 4 wheel alignment as soon as possible. If you've got some other projects you're working on like tie rods, RTABS, etc. then wait till you've finished them all.
19. Enjoy the firmer rear suspension.


Conclusions

After getting my 4 wheel alignment done, the rear end seems much more firm and planted. Once again I did a lot of things at once, so it's really hard to comment specifically. I replaced them at 100k which seemed just about right.


© 2001-2018 Bmw330ci.net
Disclaimer
This site is not affiliated with BMW NA or BMW AG. The BMW name, trademarks, and logos are the registered property of BMW AG.
All product manufacturer logos are property of their respective manufacturer.