
![]()
![]()
Do-It-Yourself information for the modifications I've completed
![]()
Do-It-Yourself information for essential wear and tear items
![]()
Articles covering all the ways to maintain your car
![]()
All about the BMW 330ci
![]()
Various links that I've found valuable
![]()
A few pictures of my car and some others
Changing Your Fuel Filter
Warning!
The information provided at "Bmw330ci.net" web site is "as is" with all faults and without warranty of any kind, expressed or implied, including those of merchantability and fitness for a particular purpose, or arising from a course of dealing, usage or trade practice. "Bmw330ci.net" web site nor it's owner/creator, can not and does not provide any warranty, expressed or implied, about the accuracy or use of information found on "Bmw330ci.net" web site. The user assumes that risk.
THE USE OF THIS INFORMATION IS FOR YOUR REFERENCE ONLY. BMW330CI.NET AND ITS OWNER/CREATOR DISCLAIM ALL LIABILITY FOR DIRECT, INDIRECT, INCIDENTAL, OR CONSEQUENTIAL DAMAGES OR INJURIES THAT RESULT FROM ANY USE OF THE EXAMPLES, INSTRUCTIONS OR OTHER INFORMATION ON THIS PAGE.
Difficulty
Changing your fuel filter isn't that difficult of a job. You will need to lift at least the front of the car to get the job done, but it is by no means difficult. It might take a little bit of time to get the old one off depending on the age of your car and the condition of the rubber fuel line hoses. I started off just using ramps, but put the whole car on stands once I realized that extra room is a good thing if you don't want gas spilled all over you!
Tools Needed
Various size flat head screwdrivers
Metric Socket Set
Bucket (To catch the fuel that will leak out)
Parts Needed
Fuel filter (BMW P# 13-32-7-512-019) $53
3x Fuel filter hose clamps (BMW P# 07-12-9-952-104) $0.62 (If you're going to replace your hoses as well you will need 6 of these. I decided not to since my hoses were still in good shape)
Instructions
Safely lift at least the front of the car
1. Using a lift or a floor jack with ramps lift at least the front of the vehicle. Instructions for jacking up your car can be found here. This can be a very dangerous step, so make sure that the car is properly secured before ever getting under it. Never get under a car that is just supported by a jack!
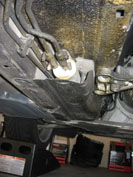 Locate the fuel filter |
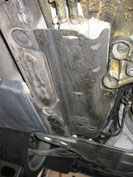 Remove the cover bolts 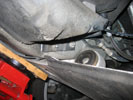 The last two are a bit hidden |
Remove the cover around the fuel filter
(For those of you who might be wondering, my jack is not lifting the car in these pictures, it's merely there as an insurance policy, because I don't want to get any thinner. Some of you out there will probably understand this and others won't.) |
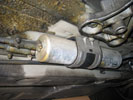 Remove the fuel filter bracket 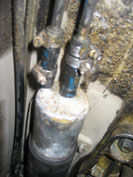 Loosen the hose clamps 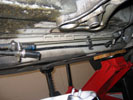 Remove the fuel filter |
Loosen the hose clamps and remove the old filter |
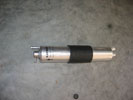 New fuel filter 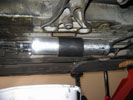 Install the fuel filter 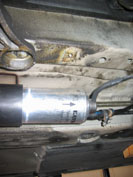 Proper orientation of the fuel filter |
Install the new fuel filter |
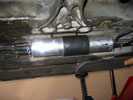 Tighten the hose clamps on the filter 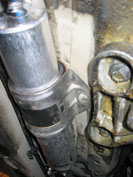 Reinstall the bracket and shield 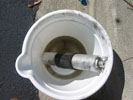 The old fuel filter |
Tighten up the hose clamps and put everything back together (I also added a picture of the gas that came out of the old fuel filter. The dirt on the bottom was already in the bucket, but as you can see the gas definitely wasn't as clean as it could have been, so I recommend you change your filter if you never have!) |
Conclusions
This is a simple do-it-yourself job and it should be completed every so often to ensure you're getting good gas mileage and not doing unnecessary harm to your engine. I'd recommend doing it every 40-60k miles, but every has their own opinions. It never hurts to make sure what is going into your engine is nice and clean, especially if you plan on owning your bimmer for a while. I know I'm planning on it!
Disclaimer
All product manufacturer logos are property of their respective manufacturer.