
![]()
![]()
Do-It-Yourself information for the modifications I've completed
![]()
Do-It-Yourself information for essential wear and tear items
![]()
Articles covering all the ways to maintain your car
![]()
All about the BMW 330ci
![]()
Various links that I've found valuable
![]()
A few pictures of my car and some others
Changing Your Coolant
Warning!
The information provided at "Bmw330ci.net" web site is "as is" with all faults and without warranty of any kind, expressed or implied, including those of merchantability and fitness for a particular purpose, or arising from a course of dealing, usage or trade practice. "Bmw330ci.net" web site nor it's owner/creator, can not and does not provide any warranty, expressed or implied, about the accuracy or use of information found on "Bmw330ci.net" web site. The user assumes that risk.
THE USE OF THIS INFORMATION IS FOR YOUR REFERENCE ONLY. BMW330CI.NET AND ITS OWNER/CREATOR DISCLAIM ALL LIABILITY FOR DIRECT, INDIRECT, INCIDENTAL, OR CONSEQUENTIAL DAMAGES OR INJURIES THAT RESULT FROM ANY USE OF THE EXAMPLES, INSTRUCTIONS OR OTHER INFORMATION ON THIS PAGE.
Difficulty
Changing your coolant is a pretty easy DIY. You will need to lift at least the front of the car to get the job done, but it is no means difficult, nor will it take a lot of time.
Tools Needed
Set Of Low Profile Ramps (To lift the front end of the car enough to drain the block)
Flexible Head Ratchet (This will help to loosen the engine block drain bolt, you can also get in a 1/4" ratchet as well)
3 Feet Of Flexible Hose 1.5" Diameter Or Greater (This will be used to run the coolant away from the engine block and your face and into the bucket.)
Large Phillips Screwdriver
Metric Socket Set
Large Bucket (At least 2 gallons capacity)
Funnel
Parts Needed
BMW Coolant (BMW P# 82-14-1-467-704) $16
Engine Block Drain Plug Washer (BMW P# 07-11-9-963-200) $0.35
2 Gallons of Distilled Water (These can be found at any supermarket)
Instructions
Safely lift the front of the car
1. Using a lift or a floor jack with ramps lift at least the front of the vehicle. Instructions for jacking up your car can be found here. This can be a very dangerous step, so make sure that the car is properly secured before ever getting under it. Never get under a car that is just supported by a jack!
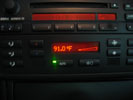 Turn on the heater |
Turn on the heater to 91 degrees at low fan speed |
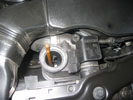 Locate the radiator fill cap |
Locate radiator fill cap and loosen the bleeder screw |
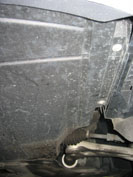 Remove the splash shield 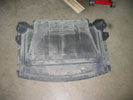 The splash shield |
Remove the splash shield underneath the engine |
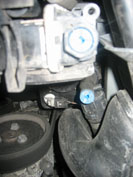 Drain screws for coolant reservoir and radiator |
Locate and drain the coolant reservoir and radiator |
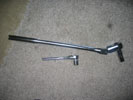 Ratchets that will fit to remove the engine block drain bolt 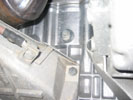 The engine block drain plug 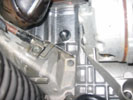 The engine block drain plug removed |
Locate and drain the engine block coolant |
Tighten the blue drain screws
13. Tighten down the blue drain screws by hand and then a little bit more with the screwdriver. Do not overtighten them since it is plastic and can break.
Mix the coolant with the distilled water
14. In your bucket, mix the entire gallon of BMW coolant with a gallon of distilled water. If you turned off your car, make sure it is back on 91F with a low fan speed.
Pour the new coolant into the coolant filler cap
15. Slowly poor the coolant into the coolant resevior through the filler neck using the funnel. Keep adding until you see coolant come out of the bleeder screw. (Note that the level indicator in the resevior will indicate that there is too much coolant in the system, but this is okay, it will go down after you drive it the first time.) Tighten down the bleeder screw (do not overtighten) and replace your coolant filler cap.
Turn on the car and check for leaks
16. Turn on the car and examine all of the places we worked for leaks. If there are no leaks, then take the car for a drive to bring the car up to temperature. Make sure you watch the temperature guage carefully. If the car starts to overheat, make sure you turn it off immedietly (safely of course) and rebleed the system.
After the engine cools down, check the coolant level
17. Make sure the engine is cooled down! Check the coolant level, and add so that the float's second notch is slightly below the filler neck.
Properly dispose of the old coolant
18. Be friendly to the environment and properly dispose of your coolant. Go to your local auto parts store or mechanic.
Conclusions
This is a simple do-it-yourself job and it should be completed at least every 2 years to ensure that your cooling system remains in good working order! This is an essential step in maintaining your vehicle and will keep it running for many more miles!
Disclaimer
All product manufacturer logos are property of their respective manufacturer.