![]()
![]()
Do-It-Yourself information for the modifications I've completed
![]()
Do-It-Yourself information for essential wear and tear items
![]()
Articles covering all the ways to maintain your car
![]()
All about the BMW 330ci
![]()
Various links that I've found valuable
![]()
A few pictures of my car and some others
Bleeding Your Brakes
Warning!
The information provided at "Bmw330ci.net" web site is "as is" with all faults and without warranty of any kind, expressed or implied, including those of merchantability and fitness for a particular purpose, or arising from a course of dealing, usage or trade practice. "Bmw330ci.net" web site nor it's owner/creator, can not and does not provide any warranty, expressed or implied, about the accuracy or use of information found on "Bmw330ci.net" web site. The user assumes that risk.
THE USE OF THIS INFORMATION IS FOR YOUR REFERENCE ONLY. BMW330CI.NET AND ITS OWNER/CREATOR DISCLAIM ALL LIABILITY FOR DIRECT, INDIRECT, INCIDENTAL, OR CONSEQUENTIAL DAMAGES OR INJURIES THAT RESULT FROM ANY USE OF THE EXAMPLES, INSTRUCTIONS OR OTHER INFORMATION ON THIS PAGE.
Difficulty
Bleeding your brakes is a pretty easy DIY. You will need a helper and will need to lift the entire car off of the ground, but it is not difficult. If you are changing out your brake fluid it will take a little bit longer since you must get all of the old fluid out.
Tools Needed
Brake Bleeding Kit (Contains a bleeder bottle with hose and can be found at any local auto parts store)
Rubber Mallet
Turkey Baster (For removing extra brake fluid from the reservoir if you're changing your fluid out)
9mm Wrench
Parts Needed
1L DOT4 Brake Fluid
(I recommend ATE Super Blue and ATE TYP 200 Yellow brake fluid. This makes changing your brake fluid easier with different colors as well as better performance characteristics.) Make sure that the bottle is fresh and has not been opened. Brake fluid is hygroscopic and absorbs moisture. Therefore, you want fresh fluid that has not absorbed any moisture (which lowers its boiling point).
Warning! Brake fluid will strip your paint! Make sure that you protect all of your cars paint and do not spill it!
Instructions
Safely lift the car and remove the wheels
1. Using a lift or a floor jack with jack stands lift the car and remove the wheels. Instructions for jacking up your car can be found here. This can be a very dangerous step, so make sure that the car is properly secured before ever getting under it. Never get under a car that is just supported by a jack!
2. Using a 17mm deep socket with an impact wrench or hand ratchet, remove the lug nuts and set your wheels aside. If your alloys are seized onto your brake rotors, sit down on your but and give the sidewalls of the tires a good kick until it has become unloosened. If they have seized on, make yourself a note to add some anti-seize lubricant to the brake rotors before installing the wheels.
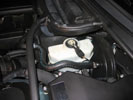
 Locate the brake fluid reservoir |
Bleed in the following order:
1. Passenger side Rear tire
2. Drivers side Rear tire
3. Clutch
4. Passengers side Front tire
5. Drivers Side Rear tire
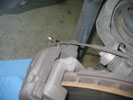
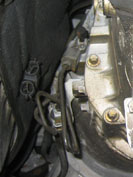
 Locate the bleeder nipple for the caliper  Locate the bleeder nipple for the clutch |
Locate the bleeder nipple |
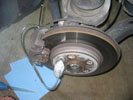
 Bleeding Setup |
Bleed |
Properly dispose of the old brake fluid
13. Be friendly to the environment and properly dispose of your brake fluid. Go to your local auto parts store or mechanic.
Conclusions
This is a simple do-it-yourself job and it should be completed at least every 2 years to ensure that your brakes remain in good working order! This is an essential step in maintaining your vehicle and will keep it running for many more miles, not to mention making sure that you're able to stop when you need to.
Disclaimer
All product manufacturer logos are property of their respective manufacturer.