
![]()
![]()
Do-It-Yourself information for the modifications I've completed
![]()
Do-It-Yourself information for essential wear and tear items
![]()
Articles covering all the ways to maintain your car
![]()
All about the BMW 330ci
![]()
Various links that I've found valuable
![]()
A few pictures of my car and some others
M3 Strut Tower Bar Install
Warning!
The information provided at "Bmw330ci.net" web site is "as is" with all faults and without warranty of any kind, expressed or implied, including those of merchantability and fitness for a particular purpose, or arising from a course of dealing, usage or trade practice. "Bmw330ci.net" web site nor it's owner/creator, can not and does not provide any warranty, expressed or implied, about the accuracy or use of information found on "Bmw330ci.net" web site. The user assumes that risk.
THE USE OF THIS INFORMATION IS FOR YOUR REFERENCE ONLY. BMW330CI.NET AND ITS OWNER/CREATOR DISCLAIM ALL LIABILITY FOR DIRECT, INDIRECT, INCIDENTAL, OR CONSEQUENTIAL DAMAGES OR INJURIES THAT RESULT FROM ANY USE OF THE EXAMPLES, INSTRUCTIONS OR OTHER INFORMATION ON THIS PAGE.
Why add a strut tower bar?
The strut towers flex under hard cornering, so adding a cross brace helps to eliminate some of that body roll. Another good reason is that BMW strut towers are farily week and will deform if you hit a big pothole, so adding a reinforcement is always a good idea. Finally, they just look good, which might be good enough for you.
Difficulty
This is not really a difficult job and merely involves loosening and tightening a few bolts. If you can work a wrench you can do this one.
Parts Needed
OEM M3 Strut Tower Bar Kit $260 (This will come with everything you need in order to complete the installation and has multiple part numbers. Just ask for the kit and you will get everything you need)
Tools Needed
Micro Torque Wrench (It needs to be able to do 18 ft-lbs accuratley)
13mm sockets and wrenches
Instructions
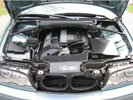 Open the hood 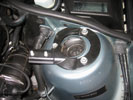 Install the brackets |
Open the hood and remove the strut tower bolts and install the brackets |
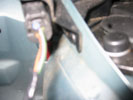 Locate the rivet to be undone 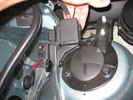 Bend it out of the way 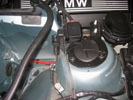 Properly install the bracket |
Bend the assembly out of the way for the passenger side |
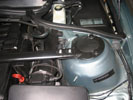 Add the cross brace 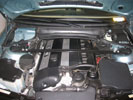 Tighten everything down |
Add the cross brace and tighten everything down 6. Add the cross bar onto the two brackets and finger tighten the brace. 7. Using either newly supplied 13mm nuts, or your old ones that we took off in the first place, finger tighten the cross brace. 8. Using a micro torque wrench, tighten all of the 13mm nuts to 18 ft-lbs. 9. Add the nut covers and ///M dust caps to the brackets and enjoy! |
Review and Conclusions
It looks good and as far as I know its doing its job. My suspension was already good, so I can't really tell if it's doint anything major. The better question is why not?
Disclaimer
All product manufacturer logos are property of their respective manufacturer.