Do-It-Yourself information for the modifications I've completed

Do-It-Yourself information for essential wear and tear items

Articles covering all the ways to maintain your car

All about the BMW 330ci

Various links that I've found valuable

A few pictures of my car and some others

Tube Elbow Replacement

Warning!
The information provided at "Bmw330ci.net" web site is "as is" with all faults and without warranty of any kind, expressed or implied, including those of merchantability and fitness for a particular purpose, or arising from a course of dealing, usage or trade practice. "Bmw330ci.net" web site nor it's owner/creator, can not and does not provide any warranty, expressed or implied, about the accuracy or use of information found on "Bmw330ci.net" web site. The user assumes that risk.

THE USE OF THIS INFORMATION IS FOR YOUR REFERENCE ONLY. BMW330CI.NET AND ITS OWNER/CREATOR DISCLAIM ALL LIABILITY FOR DIRECT, INDIRECT, INCIDENTAL, OR CONSEQUENTIAL DAMAGES OR INJURIES THAT RESULT FROM ANY USE OF THE EXAMPLES, INSTRUCTIONS OR OTHER INFORMATION ON THIS PAGE.

Diagnosis
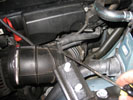
The symptoms of a hole in the tube elbow are a whistling intake noise during normal driving. You can probably only hear it when your windows are down and you're accelerating. It may or may not throw a check engine light. The easiest way to check and see if you have a torn tube elbow is to follow the intake hose down and use your fingers to search for holes. Mine had a hole about the size of a finger on the smaller hose that connects to the idle control valve.

Difficulty
This job is fairly simple but because of the small spaces it is tedious. It should take roughly 30-45 minutes from start to finish and if you can use a wrench and a ratchet, you can definitely do this job.

Parts Needed
Tube Elbow (BMW P# 13-54-1-438-759) $12-18

Tools Needed
6mm, 10mm Sockets with extensions
T30 TORX Socket
6mm Wrench
3/8" Ratchet (1/4" Ratchet will help make things easier)
Needle Nose Pliers
Flat-Head Screwdriver

Instructions
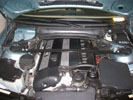

Locate The Cabin Air Filter
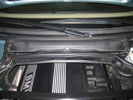

Remove The Twist Screws

Remove The Torx Bolts
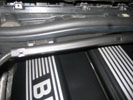

Remove The Cover
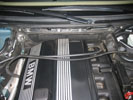

Remove The Box

Remove The Cabin Air Filter Box
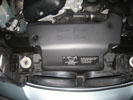
1. Open the hood and remove the three spring twist screws and lift the cover up for the cabin air filter.
2. Remove the cabin air filter and its cover.
3. Using the T30 TORX socket remove the 4 screws that hold entire assembly to the back of the engine bay. Carefully remove the cover that holds the hose and cable to the cabin air filter box. Remove the air filter box.


Remove The Twist Screws


Remove The Partition
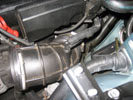

Plenty Of Room Now

Remove The Plastic Partition
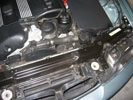
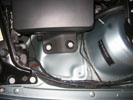
4. Now remove the plastic partition that separates the engine bay from the master cylinder (To the right of the engine bay). There are two twist screws holding this on. Be careful as they are likely to pop out when they come off, so be prepared. There are lines in the way, so it will involve carefully maneuvering it around these lines, but it will come out. You now have the room you need to do the work (Note: the spaces are still really tight)


Remove The Expansion Rivets


Remove The Intake Tubing


Remove The Bolts

Loosen The Hose Clamp And Remove The Hose


Unlatch The Lower Intake


Move The Airbox Away

Remove The Ducting And Air Box
5. Remove the ducting (by where the hood latches) by using needle nose pliers or screwdriver to pull out the expansion rivets. Just pull the round looking screw vertically and remove them.
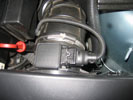
6. Using the 6mm socket, loosen the clamp that connects the mass airflow sensor to the intake hose. Do not worry about the sensor since it will stay attached to the air box.
7. Using the 10mm socket, remove the two bolts to the right of the air box holding it down.
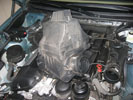
8. Slowly and carefully move the air box so that it is sitting on top of the engine. Pull the back of the air box that connected to the intake hose upwards and it will come out just fine. Disconnect the lower intake to the air box as well and leave it in its place. Remember to be careful with the mass airflow sensor, since it is an expensive replacement.


Remove The Vacuum Hose


Loosen Hose Clamps


Remove The Upper Intake Hose

Loosen The Hose Clamps And Remove The Tube Elvow


Closeup Of Tube Elbow Clamp

Remove The Hosing And Replace The Tube Elbow
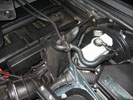
9. Remove the vacuum hose on the top of the intake hose. This can be a little difficult so I recommend getting a flat head screw driver and using it to help pry on the hose.
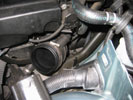
10. Loosen the next two clamps that connect the upper and lower intake hose using a 6mm socket. They will need to be pretty loose so that you can remove them easily.
11. Remove the upper intake hose as well as the plastic connector that goes in between.
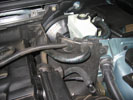
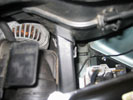
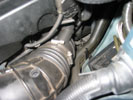
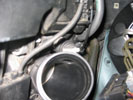
12. Using either a 6mm socket or the wrench start by removing the smaller diameter hose that connects to the idle control valve on the tube elbow. This will be difficult, but eventually it will loosen enough for you to be able to pull the hose off. You will need to come at it by going by the master cylinder, since that is the only room you will have to get at the clamp. The clamps nut will be facing down and you might be able to get a 1/4" ratchet down there; I just used the 6mm wrench. Next loosen the larger diameter hose that connects to the throttle body using the same method.
13. Remove the tube elbow, which will probably be stuck on there pretty good. With some force it will come off. Feel free to cut it to get a better grip since it's going in the trash anyways.
13. Put the clamps back on the new tube elbow put everything back the way it was put in.

Conclusions

After replacing the tube elbow the intake whistle has disappeared and the car appears to run better since it is now able to correctly meter the air coming into the engine. Furthermore, I noticed about an increase in my gas mileage, which makes this fix definitely worth your trouble.

© 2001-2018 Bmw330ci.net
Disclaimer
This site is not affiliated with BMW NA or BMW AG. The BMW name, trademarks, and logos are the registered property of BMW AG.
All product manufacturer logos are property of their respective manufacturer.